Hello friends,
Spring is starting and it's time for creativity to bloom! There is a ton happening in the world of Stampin' Up! this month. The Waves of the Ocean pre-release and limited time items are here, the All Together Collection is flying off the shelves, and before we know it March 23 will be here with the release of the 2021-2022 Annual Catalogue Retirement List.
TIP: If you haven't stocked up your stash of 2020-2022 In Color cardstock, ink, refills, and embellishments, I recommend doing that sooner than later - they usually sell out quickly!
I thought I'd add a bit more colour to the season with a lovely slimline card perfect for your favourite colouring tool. I picked Stampin' Blends for mine, but watercoloring or Watercolor Pencils would be great, too. The tutorial features the In The Moment stamp set and a quick ruffle technique using the Heart & Home Doilies.
Enjoy the card tutorial!
~ betty
In The Moment Slimline Card
Project Inspiration-In The Moment Slimline Card
We all deserve a moment to relax and reflect. Share that peaceful moment with a dear friend when you create and send a thoughtful card! This card tutorial features the In The Moment stamp set (#157987) that is perfect for some relaxing colouring techniques like watercolor, watercolor pencils, or Stampin Blends alcohol markers. The Heart & Home 12" x 12" Designer Series Paper (#157928), Heart & Home Doilies (#157956), and Classic Matte Dots (#158146) add the perfect details. Lastly, the Slimline Envelopes (#157981) make this card ready to send in style.
Project - Step 1
1. Cut Slimline Card
Cut Misty Moonlight cardstock to 7" x 8-1/2". Score at 3-1/2" along the 7" side. Adhere 8-1/4" x 3-1/4" Basic White cardstock inside card. Cut Heart & Home paper to 8-1/2" x 3-1/2". Score at 1" along the 3-1/2" side. Adhere to card front. Leave folded flap loose for now.
Project - Step 2
2. Stamp
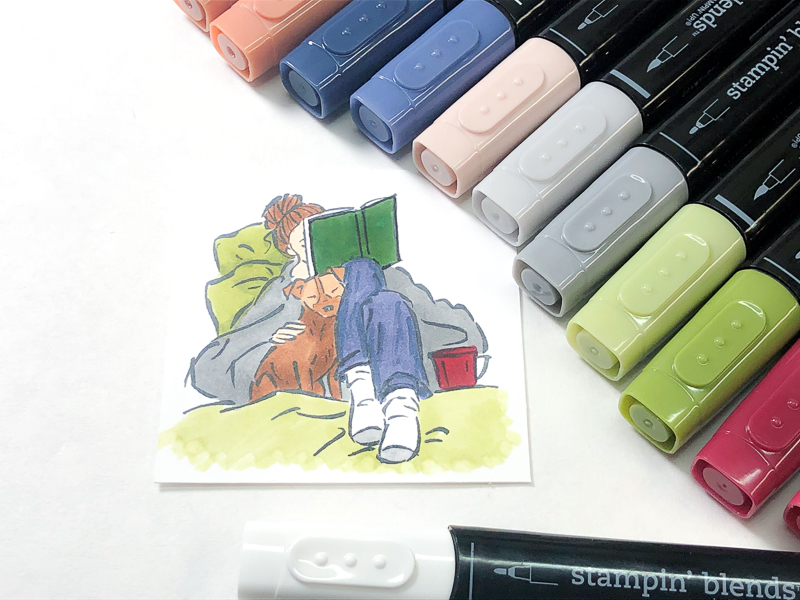
Stamp image from In The Moment stamp set onto 2-3/4" square of Basic White cardstock with Tuxedo Black Memento ink if coloring with Stampin' Blends. If watercoloring use Jet Black StazOn ink.
Project - Step 3
3. Colour
Colour image with your preferred colouring tools. After colouring adhere to 3" square of Garden Green cardstock. This sample uses Stampin' Blends in Cinnamon Cider, Misty Moonlight, Old Olive, Smoky Slate, Cherry Cobbler, Ivory, and Color Lifter. Garden Green Stampin' Write Marker.
Project - Step 4
4. Cut Doily
Cut a Cinnamon Cider Heart & Home Doily in half. From the center of each half, snip pie-shaped wedges towards the edge stopping at the inner pierced circle.
Project - Step 5
5. Create Doily Ruffle
Add a strip of Stampin' SEAL+ or Tear & Tape behind the left edge of the stamped and layered square. Starting at one corner, line up the edge of the doily and then fold and pinch the doily to create a ruffle.
Project - Step 6
6. Finish Doily Ruffle
When the first doily half is added, begin adding the second half. Trim off excess doily when you reach the edge of the cardstock. Press the doily firmly into the adhesive. Add Stampin' Dimensionals to each corner of the square.
Project - Step 7
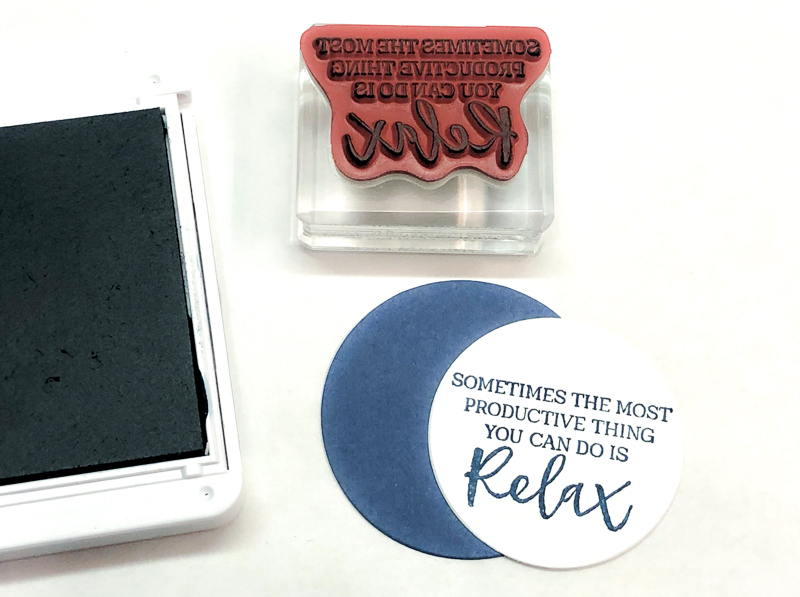
7. Stamp & Die Cut
Stamp greeting on Basic White cardstock with Misty Moonlight ink. .Die cut the greeting and scrap Misty Moonlight cardstock with Layering Circles dies (#151770). Adhere circles together.
Project - Step 8
8. Finish Card
Add Stampin' Dimensionals behind the scored flap on the Heart & Home paper and adhere the fold down for a bit of extra interest. Add stamped and coloured image and greeting circle with Stampin' Dimensionals. Add White Classic Matte Dots.
Project - Step 9
9. Colouring Details
Above is a closup of the colouring using Stampin' Blends.
Supplies as seen above
In The Moment stamp set #157987
Heart & Home Designer Series Paper #157928
Heart & Home Doilies #157956
betty-ann manghi
Stampin' Up! Demonstrator
Canada
(604) 523-9839
stampingbetty@hotmail.com
www.betty.stampinup.net


Comments