This month's tutorial features a simple technique perfect for the Dist-INK-tive stamps in the new Amazing Silhouettes bundle!
~ betty
Amazing Silhouettes Card
Project Inspiration - Amazing Silhouettes Card
Can you believe this colourful card was created with a single stamped image? It's true! The butterfly image looks complex but all it takes is ink, Sponge Daubers, and a spritz of water to make the magic!

The Amazing Silhouettes Bundle (#157819) is really unique, and I love it! It has layering die cut words with the Amazing Thanks Dies (#157814) and the Amazing Silhouettes stamp set (#157814) is a Dist-INK-tive set that creates a faux emboss resist effect by stamping "around" the image and leaving a negative space. Try it with patterned paper or heat embossing for even more amazing looks!
Let's flit off and create something beautiful!
Project - Step 1
1. Stamp & Fold
Cut Polished Pink cardstock to 4-1/4" x 11". Score at 5-1/2" along the 11" side. Randomly stamp edges of card with the butterfly stamp using VersaMark ink for a subtle texture.


Project - Step 2
2. Add Layers
Cut Heart & Home diagonal wood patterned paper to 3" x 5-1/2". Adhere to 3-1/4" x 5-1/2" Basic Black cardstock. Adhere to center of card front. Adhere 4" x 5-1/4" Basic White cardstock inside for a writing area.
Project - Step 3
3. Die Cut Greeting
Die cut "thanks" from the Amazing Thanks Dies (#157816). Cut the background from Basic Black and the detailed word from Polished Pink cardstock. Adhere together with Multipurpose Liquid Glue or adhesive of your choice.


Project - Step 4
4. Sponge Stamp
Dist-INK-Tive stamps created a multi-shaded image and work best with a lighter application of ink. Sponge Daubers are a great option. Use Sponge Daubers to add Daffodil Delight, Pumpkin Pie, and Polished Pink ink to the stamp. Cover about 1/3 of the image with each colour, but overlap sections of the stamp a bit to blend.
Project - Step 5
5. Spritz & Stamp
Spritz sponged stamp with 2-3 spritzes of water using a Stampin' Spritzer (#126185). Let the water sit for about 15 seconds. Place 2-3/4" square piece of Basic White at a diagonal, like a diamond, and stamp. Hold the stamp in place for a count of 10 to let the ink absorb well. Adhere to a 3" square of Basic Black.


Project - Step 6
6. Embellish
Adhere stamped butterfly to card front with Stampin' Dimensionals. Wrap Black Baker's Twine from the Baker's Twine Essentials Pack (#155475) around the top front of the card and tie in a bow. Adhere die cut greeting with liquid glue. Add several Polished Pink jewels from the 2021-2023 In Color Jewels (#155571) to the card front.
Supplies
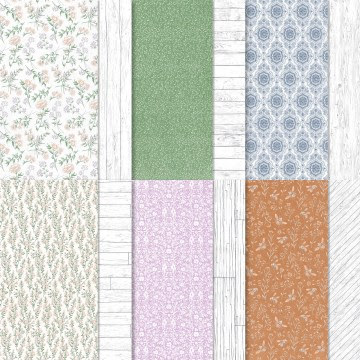
Heart & Home Designer Series Paper #157928
Heart & Home Designer Series Paper
MORE
Sponge Daubers #133773
Sponge
Daubers
Amazing Silhouettes Bundle #157819
Amazing Silhouettes Bundle
SHOP www.betty.stampinup.net
When you spend under $200 (before shipping and taxes) please use Host Code: 9HN2KVTN
Orders over $200 please do not use code as you will receive bonuses when you place your order.


Comments